How to use AI to generate images
How can you get AI-generated images? Here are the steps involved when generating images online for free.

Step 1: Find a Reliable Free AI Image Generator
To generate AI images online for free, start by finding a reliable free AI image generator. Begin your search by exploring reputable platforms or websites with AI powered image generation services at no cost.
For instance, a platform like ChatGPT is used for AI art; therefore, it can be a good place to start.
To identify the best AI image generator, look for user reviews and recommendations to ensure the platform’s credibility and reliability. Popular options often include user-friendly interfaces, making the process accessible for beginners.
Additionally, consider platforms backed by reputable AI research institutions or open-source communities, as they tend to provide reliable and secure services.
Once you’ve found a trustworthy free AI image generator, you can explore the platform’s features and follow their specific instructions to generate your desired AI images creatively and effortlessly.
Step 2: Upload an Existing Image or Fill Out a Text Prompt
You can upload an existing image or fill out a text prompt to get AI-generated images for free. If you’re using an existing image, upload it to the AI image generator platform. The AI algorithms analyze the image’s features and style to create a modified or enhanced version based on your preferences.
Alternatively, if you’re generating an image from text, be descriptive. Specify the scene, colors, objects, and overall ambiance you envision. For example, you could say, “A serene beach at sunset with palm trees, golden sand, and a colorful sky.” The more detailed your description, the better the AI can understand your vision.
When using text-to-image tools, the AI photo generator interprets your image description and generates AI art that aligns with your words. Whether it’s a vivid landscape, abstract concept, or specific object, the AI uses its trained algorithms to translate the text prompt into a visual representation.
After submitting your input, the AI processes the data, generating unique images that reflect the essence of your description.
Step 3: Create an AI-Generated Image
Creating an AI-generated image involves harnessing the power of algorithms and creativity. Once you find a reputable free AI image generator online and upload the existing image or use text-to-image prompts, the AI interprets this input, processing it through complex neural networks.
The AI comprehends your request; it generates stunning images based on your description. Keep in mind the processing time varies based on complexity.
Step 4: Customize the Generated Image
After your AI interprets your input, the next step is to customize the AI generated images. If you are using a free AI image generator, you can access basic editing tools to refine your AI art. You can adjust colors, contrast, and saturation to match your vision accurately.
Some platforms enable resizing and cropping, ensuring the image fits your requirements. Additionally, you explore artistic filters or styles inspired by famous painters, adding a unique touch to create amazing images. Add text overlays, stickers, or frames to enhance storytelling in your image.
Experiment with these features until you get the perfect image. Customization personalizes your AI-generated image and empowers you to express your creativity.
Step 5: Use the AI Images in Various Applications
Once your AI image is ready, download it to your device. From here, you can use it for different purposes. For instance, you can use it for the following:
·Incorporate the image into your social media posts, blog articles, or presentations, enhancing visual appeal and engagement
·Use it as a base for further creative projects, adding layers or effects
·Use AI-generated images to personalize your website, marketing materials, or profile pictures
The versatility of these AI creations empowers you to enhance your digital presence and creative endeavors across numerous platforms.
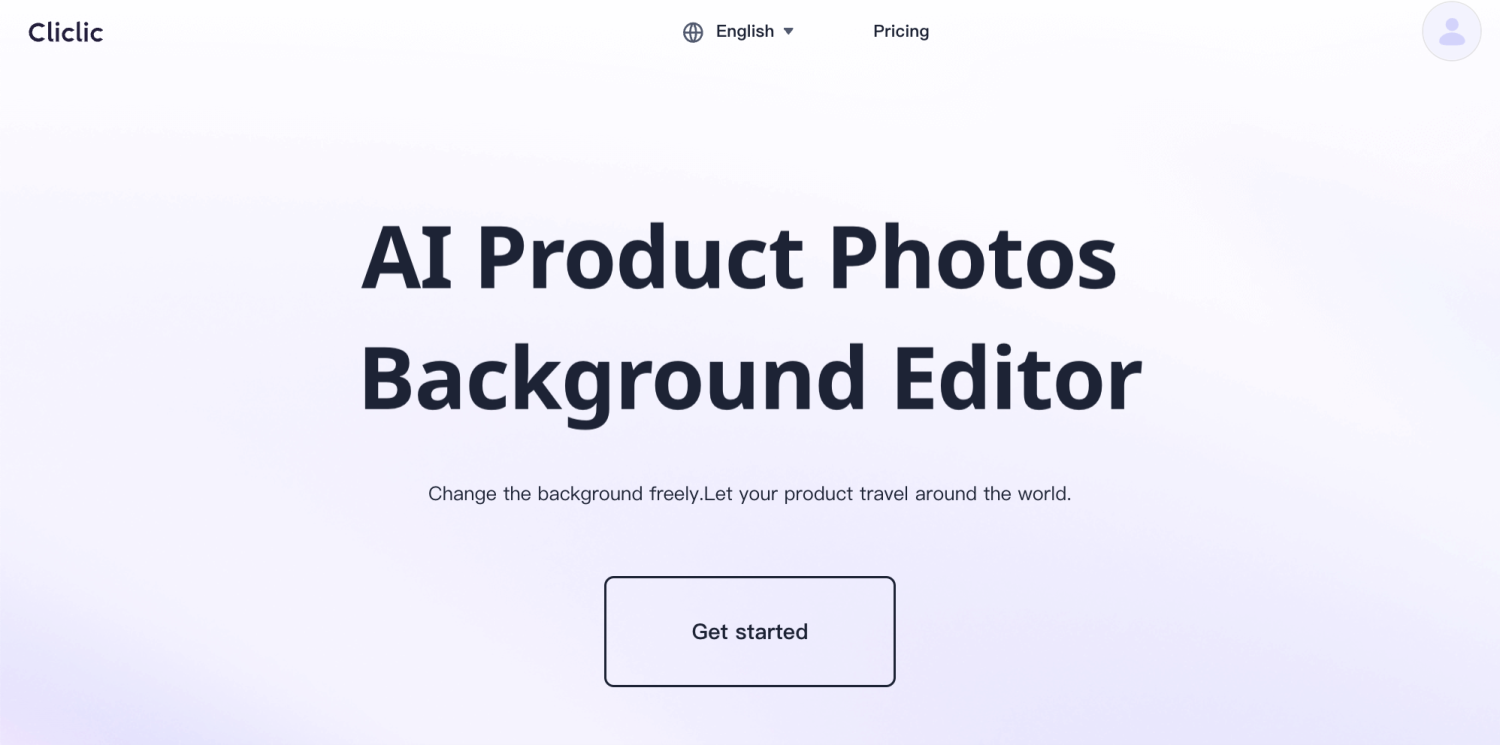
Here we recommend a useful AI product photo generation tool for everyone
With Cliclic AI background generator, you can effortlessly make custom backgrounds for any occasion.Simply describe the background image you want in text, and Cliclic will automatically generate a series of AI backgrounds tailored to your needs in seconds.
What are the functions of Cliclic AI?
1. Support uploading product photos and one click removal of background;
2. Multiple background image classifications are preset, supporting custom editing of station positions and background elements;
3. Multiple product images can be generated at once for you to freely choose from;
4. The software is easy to use and does not require professionals, making it easy to create product images.
How to Make Backgrounds With Cliclic's AI Background Generator?
Step 1: Log in or register
To use Cliclic, you need to create a Cliclic account and log in.
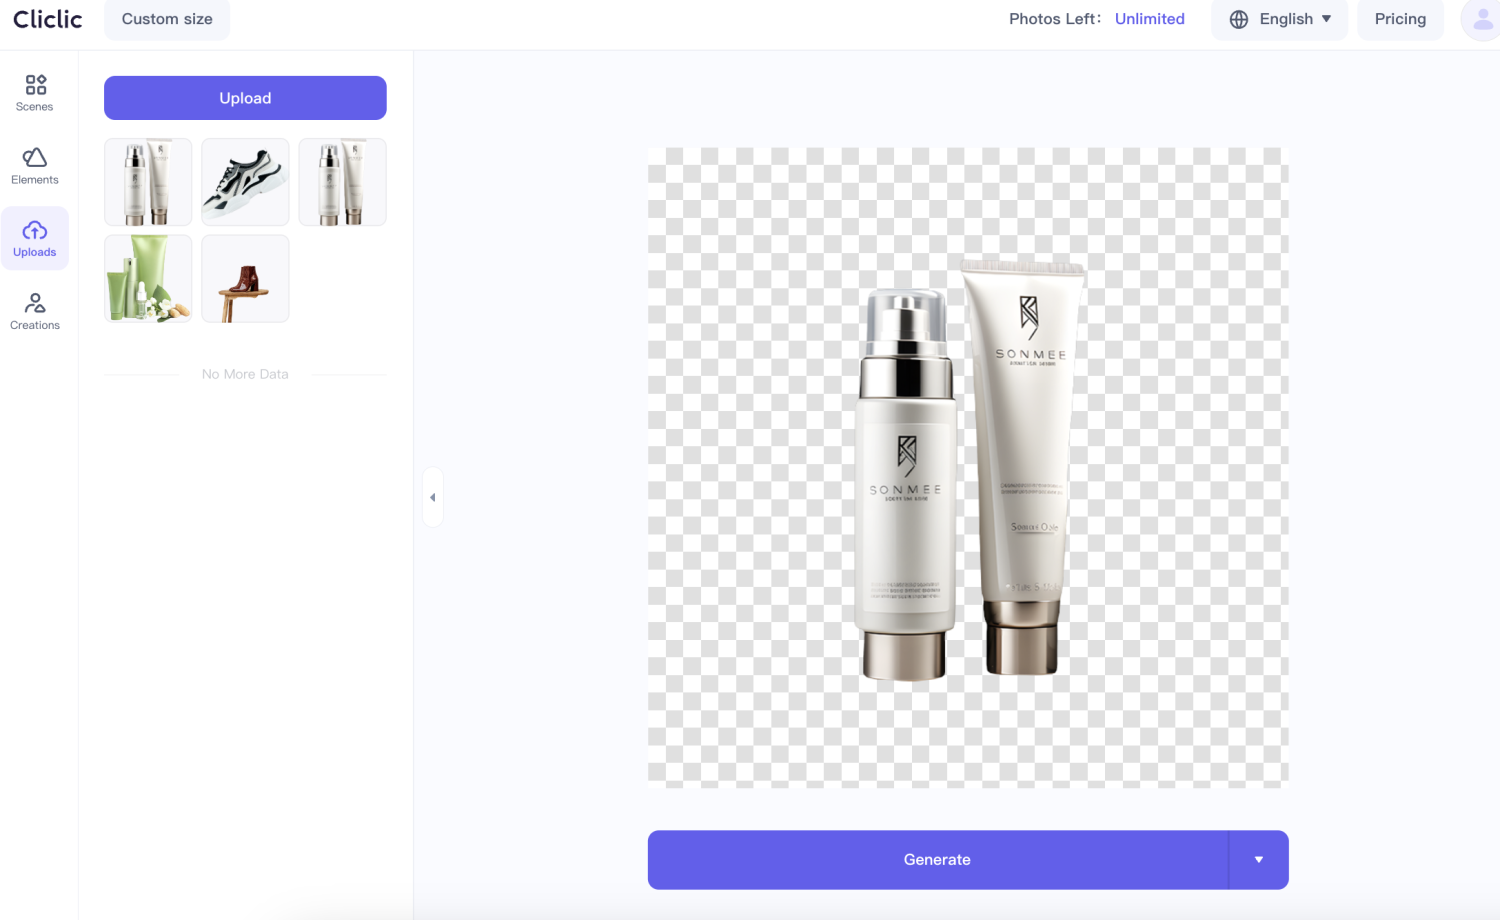
Step 2: Upload photos of your skincare products
After entering Cliclic, click the upload button to upload your product image.
If the image you upload happens to have a background, Cliclic will automatically deduct the background and keep the product itself
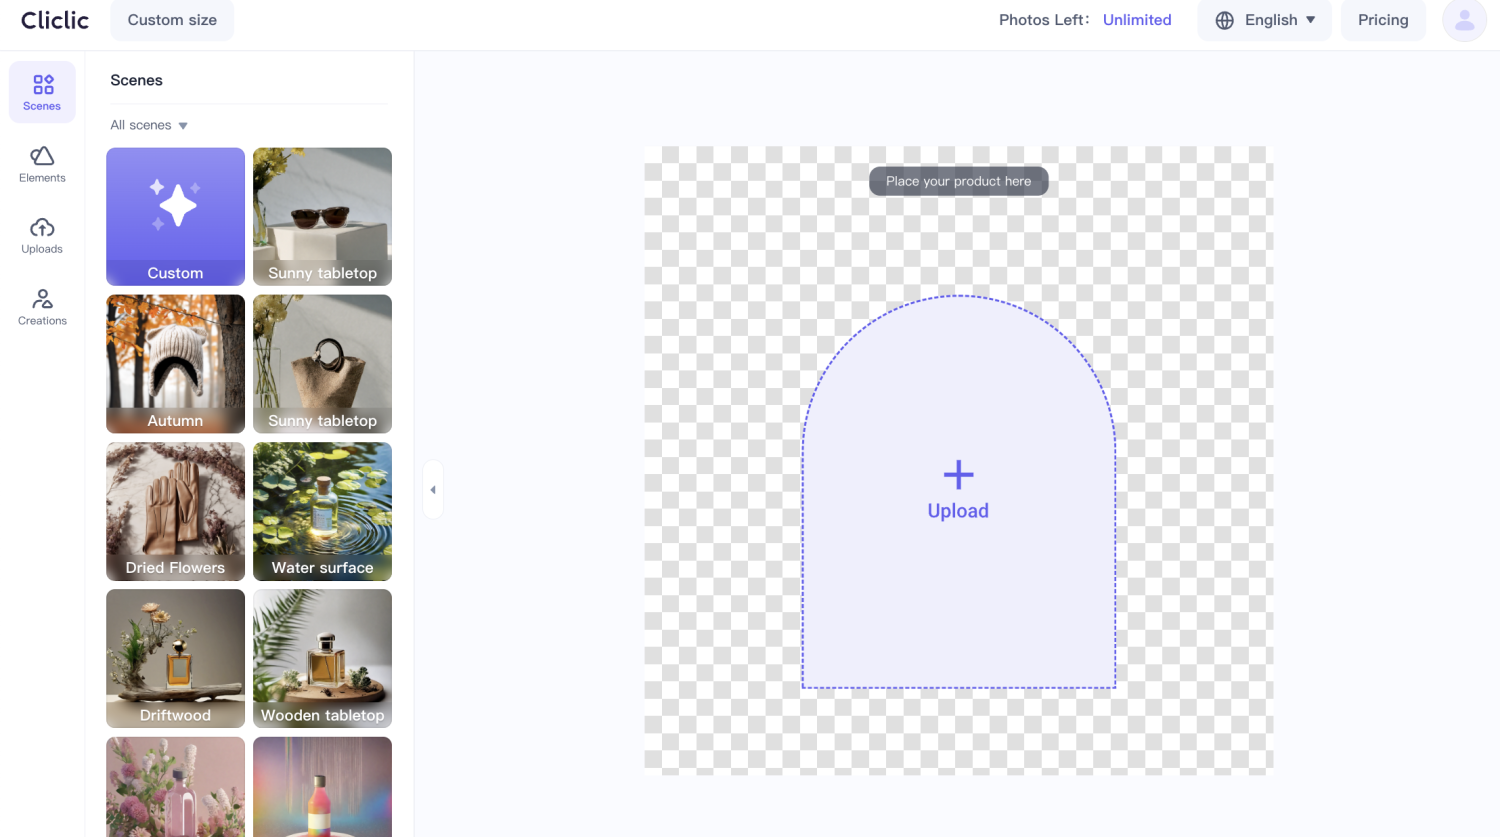
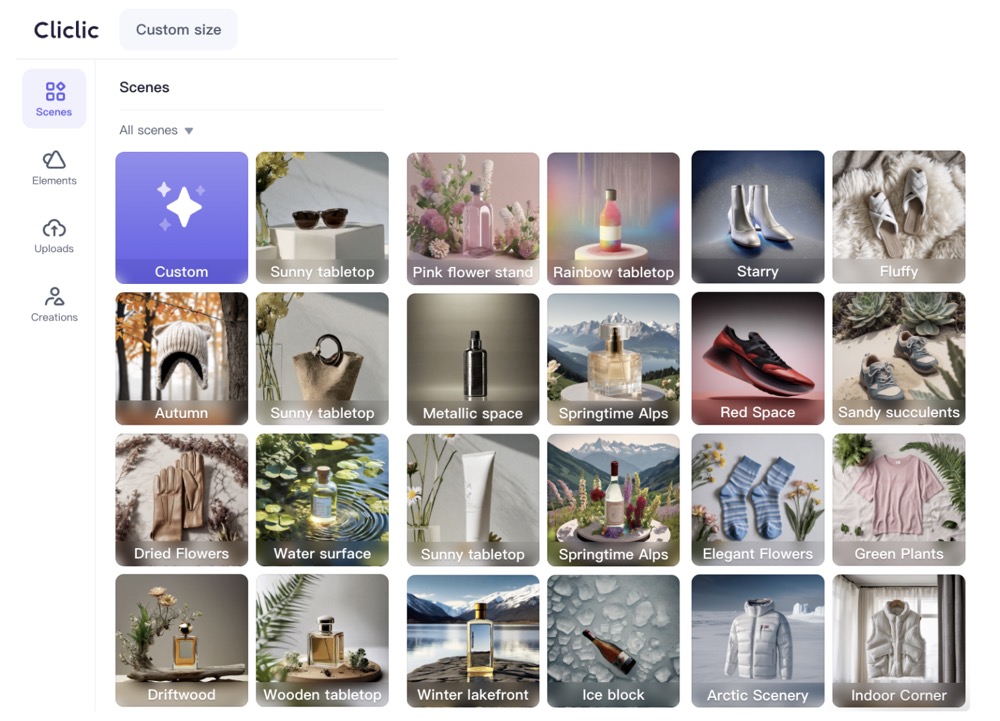
Step 3: Select background classification
When selecting a background for product photos, we provide you with a pre made background template. You are free to use any of them, but we have categorized them so that you can easily find the product that best suits you.
You can also adjust the scene by selecting appropriate positioning, materials, background elements, etc;
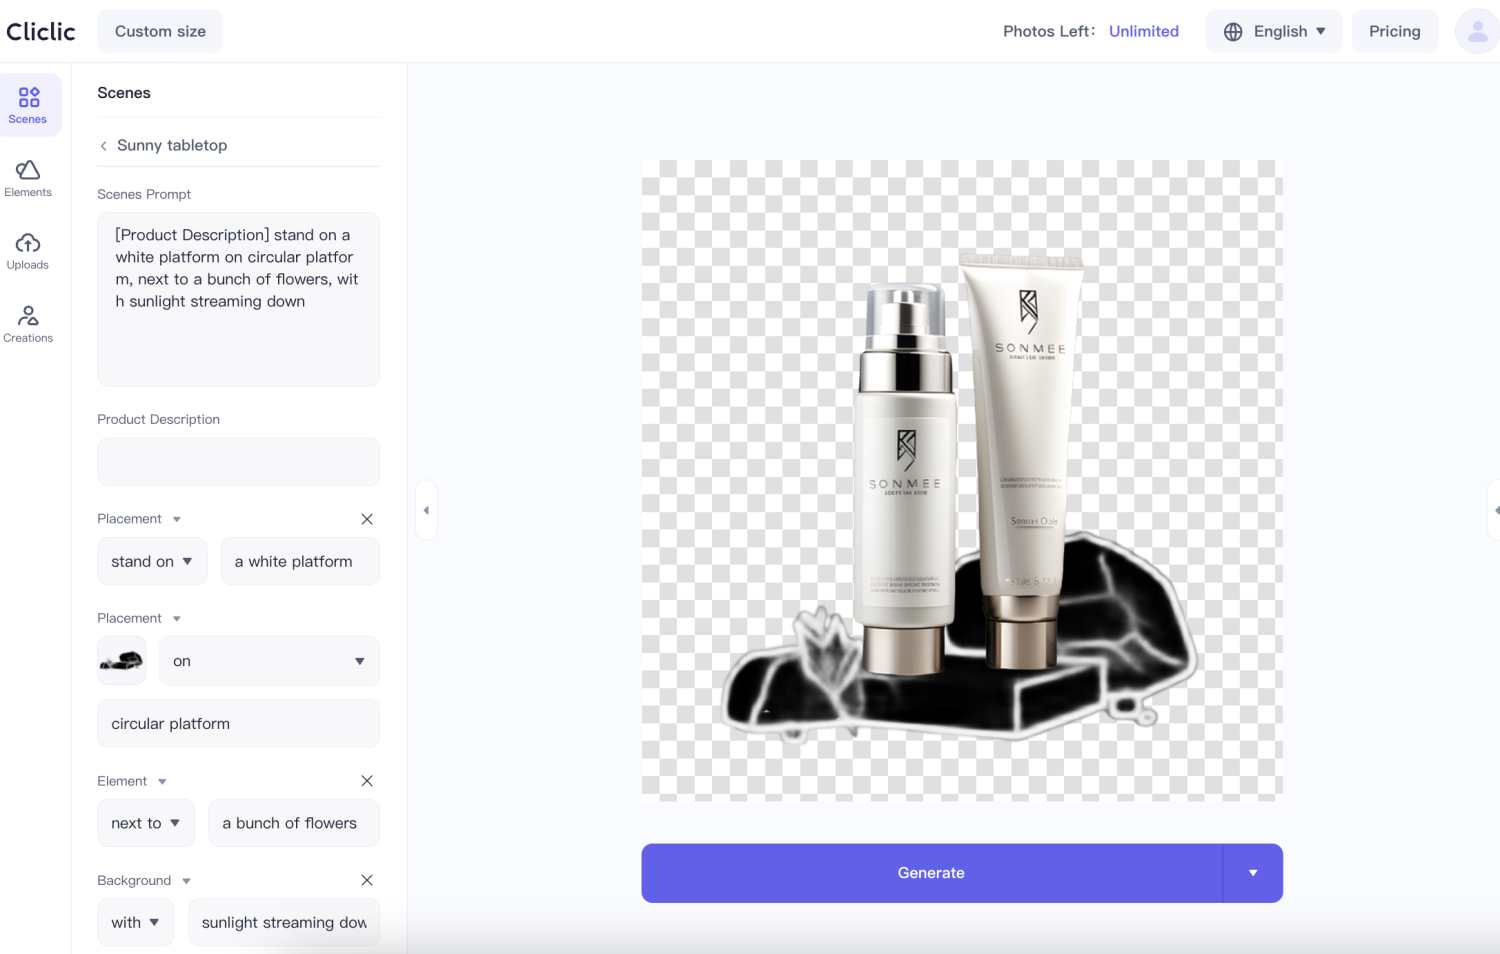
Simply click the "Start Generation" button to start rendering. It only takes a few seconds to render unique product photos.
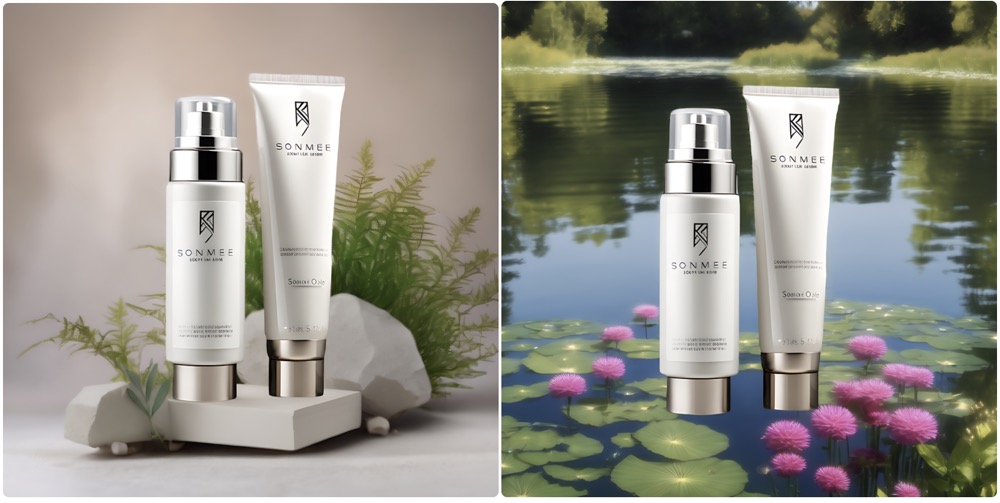

This completes the replacement of the product background image. You can send the created product image to various online platforms, bringing more traffic and sales than you can imagine for your product.
Quick and Easy Photo Background Change Online
With Cliclic’s free online AI background changer, you can change image backgrounds, add backgrounds to photos, and edit backgrounds in seconds. Try it now!